Using VMware 2
Marc Fonvieille <[email protected]>
Introduction
Occasionally, you will need to use programs that are
only available for Windows. There are a few solutions
to this problem, and one of them is VMware. VMware is
a virtual machine, which can be used to run Windows
9X/NT/2k, Linux, MS-DOS, and even FreeBSD. In this
article, I'll demonstrate how to run Windows 98 in
VMware.
Getting Ready
First, you must get an evaluation license from the VMware web site.
Make sure the license you get is for a "VMware
Workstation for Linux". On the web site, you will
have to fill out a form to get the license. After
doing so, you'll get an email with the license
data.
VMware is a Linux binary, so make sure you are
running the Linux compatibility module. If you
aren't, or you're not sure if you have it installed,
you can install it with the steps below.
# cd /usr/ports/emulators/linux_base
# make install distclean
I used my laptop as the test machine throughout this
article. It is a Celeron 466 MHz with 160MB of RAM, and
about 700MB left on the hard drive. It is running
FreeBSD 4.2-STABLE. I think a 400 MHz cpu with 96MB
of RAM and 600MB left on the hard drive should be
sufficient. The faster the cpu and the more memory
you have, the better off you will be.
Installation
Installation is quite simple.
# cd /usr/ports/emulators/vmware2 && make install clean
The build process will ask a few questions. Below
are the questions and my answers:
Do you want to use netgraph bridging?
Since you can use the network without bridging,
I chose no here.
- What will be the IP address of your host on your
private network?
It's the IP address of the interface
vmnet1, the network interface seen by
the host OS (the one running VMware, in this case,
FreeBSD). You can accept the default, but you must
choose a subnet that is different from your LAN's
subnet. vmnet1 is created at boot by
the vmmon module.
The next few questions are about the netmask (it
depends on the IP chosen in the previous question) and
choice confirmation.
When installation finished, I rebooted the laptop.
After boot, running ifconfig -a shows a new
interface:
vmnet1:	flags=8843<UP,BROADCAST,RUNNING,SIMPLEX,MULTICAST> mtu 1500
	inet 192.168.254.1 netmask 0xffffff00 broadcast
	  192.168.254.255
	ether 00:bd:c9:03:00:01
Running kldstat should show:
% kldstat
Id Refs Address    Size     Name
1    6 0xc0100000 202388   kernel
2    1 0xc0bd3000 2000     rain_saver.ko
3    1 0xc0be1000 2000     rtc.ko
4    2 0xc0be4000 11000    linux.ko
5    1 0xc0bfe000 9000     vmmon_up.ko
6    1 0xc0c08000 4000     if_tap.ko
vmmon_up, if_tap, and
linux are the required modules to run
VMware.
Before configuring VMware, the license must be saved
in your home directory as
~/.vmware/license2.0.
Configuration
Now that VMware is installed, we need to configure a
virtual machine for Windows98 (you can configure many
virtual machines).
Each time you use VMware, the Linux process file
system (linprocfs) must be mounted. To mount it, do
this as root:
# mount -t linprocfs /proc /usr/compat/linux/proc
Note: You need to be root to mount
linprocfs, but running VMware as root is a
very bad idea.
To launch VMware, simply run it as your regular user
on the command line:
% vmware
After VMware begins, you need to go through and
configure VMware. The steps I chose are below. Click
the links in each step to see a screenshot of the
step.
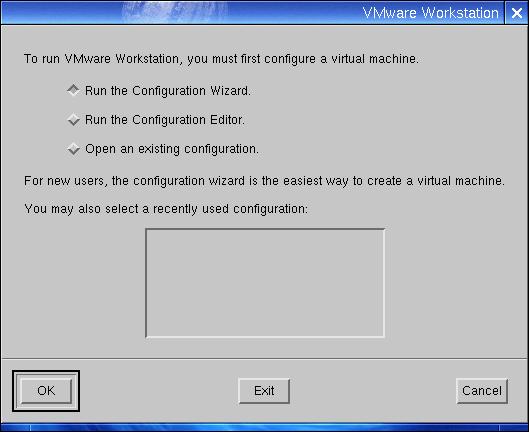
First, you'll be prompted with a window to configure a
virtual machine.
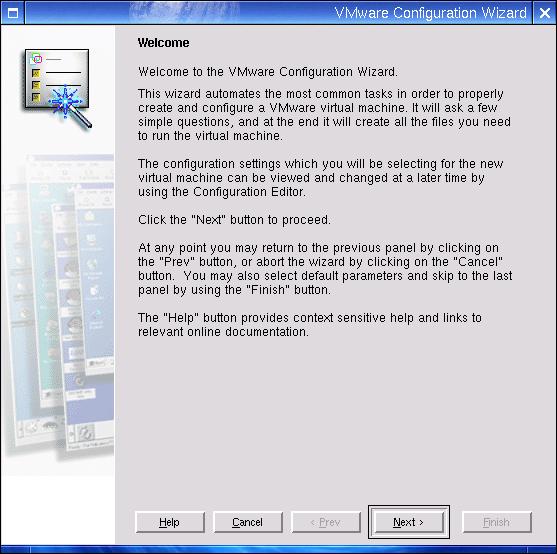
In order to do that, use the Configuration
Wizard.
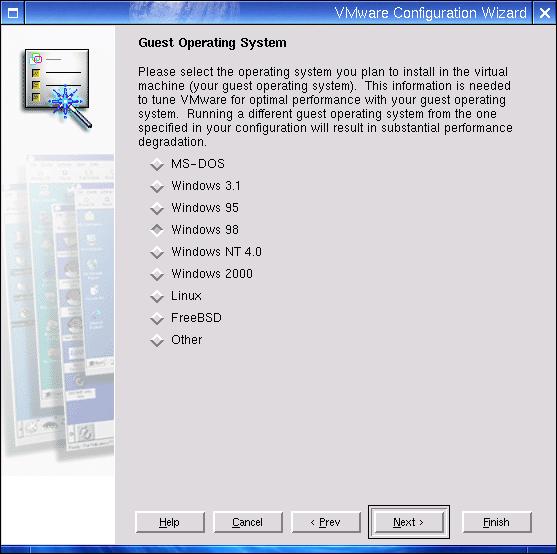
Chose Windows 98 as the guest
OS.
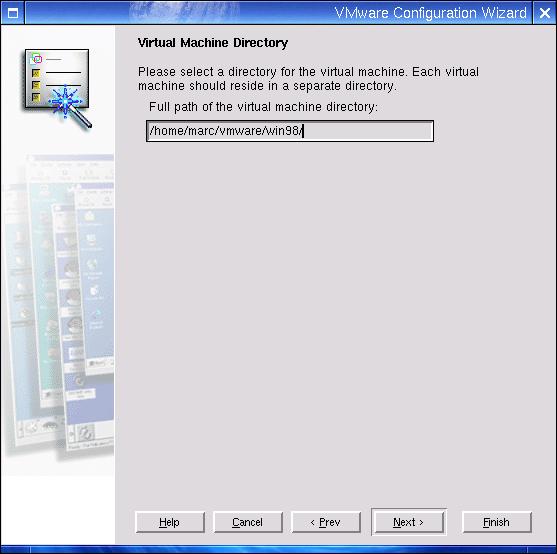
Each virtual machine has it's own directory.
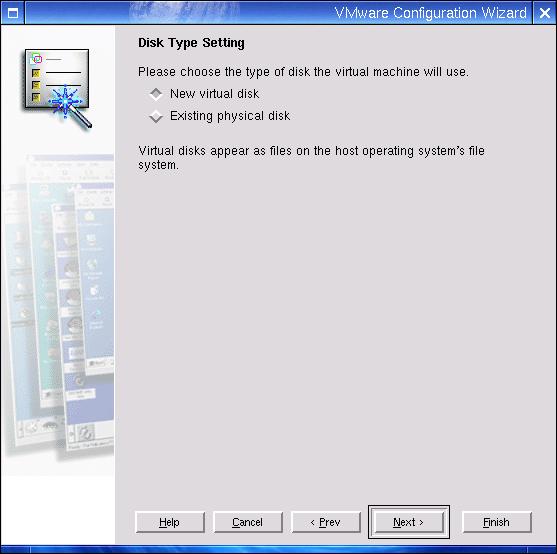
To install the guest OS, you'll need to set up
a virtual
hard drive. It an be a file or a physical disk,
but a file is easier deal with.
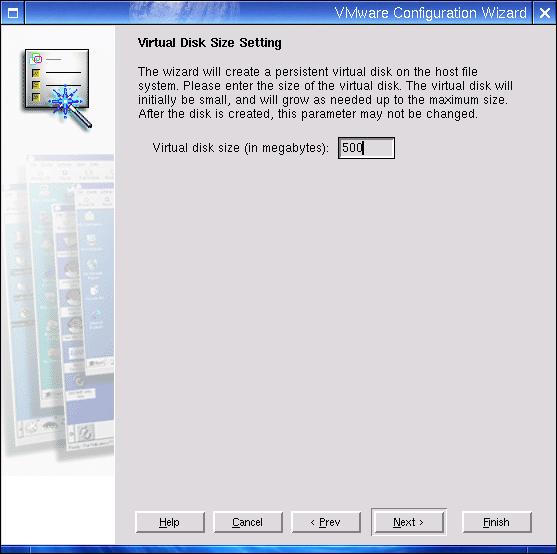
For the disk size,
I chose 500MB. That should be enough to install a
minimal Windows 98 and some applications, and it can
be saved on a CD-RW.
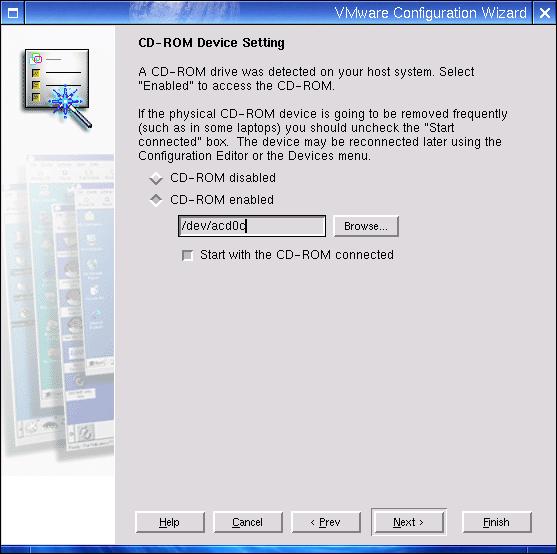
Next, enable and choose the right device for
the CDROM
drive. To boot from the CDROM, the drive has to
be connected. In this case, I'm installing Windows
98 from CDROM.
Now it's time for the floppy
configuration.
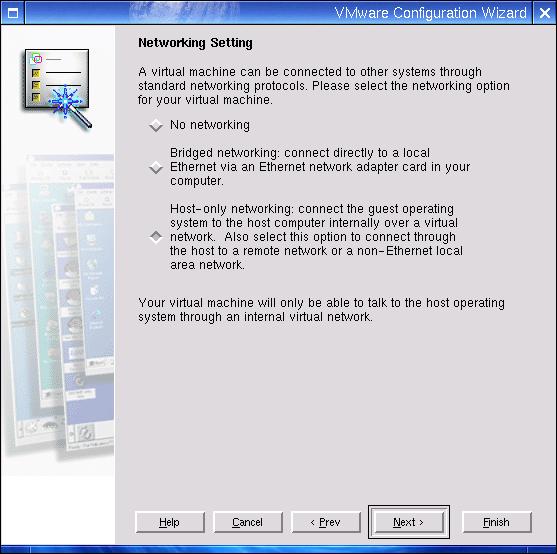
For the network
settings, I chose "Host-only".
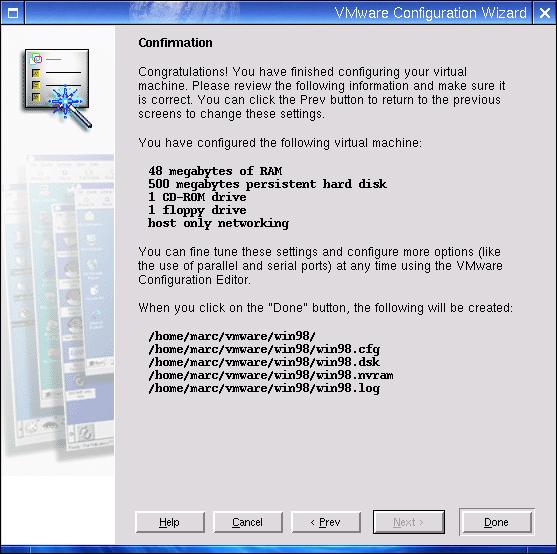
The configuration is now done.
The Configuration Wizard didn't ask me the amount
of memory for the virtual machine. You can set it in
the settings menu, then Configurator Editor.
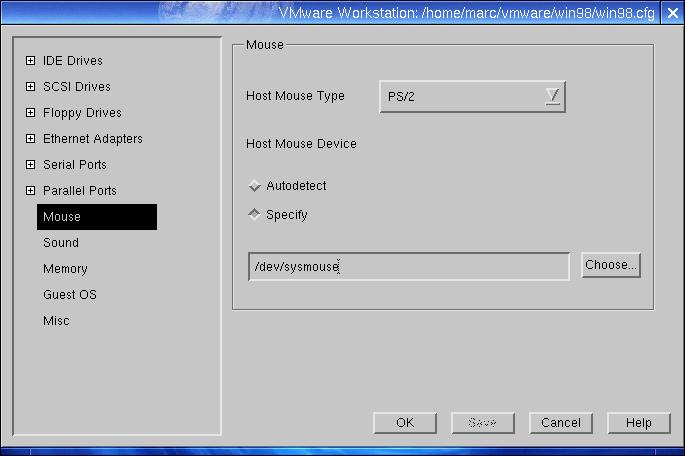
It also didn't ask about the mouse. To configure your
mouse, choose Settings, then Configurator Editor
and choose the right mouse type and device.
Now it's time to install Windows 98. Insert the
CDROM into the drive and click the "Power On" button
to launch the virtual machine.
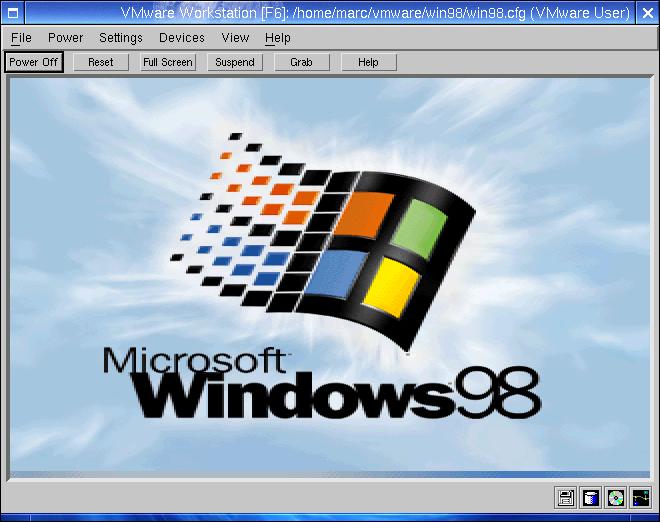
Once the virtual machine boots, the installation
will start as it would on a real machine. The install
process was quite long on my laptop but finished
without problems. When the install is over, Windows
98 should boot
up.
For the moment, VMware only uses a 640x480
resolution window with 16 colors. Play with Windows
for a few seconds, then stop VMware. After Windows
shuts down, a VMware hint window appears mentioning
VMware Tools. VMware Tools allow you to use a virtual
SVGA card with more colors when you run the virtual
machine, so it's a good idea to install these
tools.
Click on "Power On" again, wait for Windows to
completely start, choose Settings, and then choose the
VMware Tools Install. After some help screens, choose
the floppy unit and launch VMware
Tools.
At the end of installation, the "Display Settings"
and notepad appear. Follow the instructions in
notepad.
With the VMware SVGA (FIFO) driver (the driver
that came with the VMware tools) you can have up
to a 16bit color display. The full screen button
didn't give me good results, but if I chose a
1024x768 monitor in the Display Settings window, I
have a 1024x768 VMware window.
Networking
Now it's time to configure networking in the virtual
machine. Go into the network configuration settings.
You should see AMD PCNET Family Ethernet (PCI and
ISA). That's the virtual ethernet card.
Select the TCP/IP line and specify the IP address
with one from the subnet chosen for the
vmnet1 interface. For example:
192.168.254.200
In this case, the netmask (Subnet Mask field) would
be:
255.255.255.0
Now you can configure the gateway. The gateway IP in
our case is 192.168.254.1. Put this in the New
Gateway field and click the add button.
Once you're done with that, you should be able to
ping the interface from our Guest OS -- Windows 98.
You should also be able to ping any other interface
installed on the FreeBSD box (the Host OS).
From the Host OS, you can directly ping the Guest OS
with:
% ping 192.168.254.200
For the moment, you can only talk between the Guest
OS and the Host OS. To talk to the rest of the LAN
from the Guest OS, you have to enable natd(8)
on the interface used to access the LAN. If you
don't know how to configure natd(8), read
the RUNNING NATD section of it's man page.
With natd(8) running, you should now be able
to ping and access other computers on your LAN from
the virtual machine, but you won't be able to directly
reach the virtual machine from the other systems on
the LAN.
The solution to this problem is to add a specific
route on all the machines by using:
# route add 192.168.254.200 192.168.1.202
This creates a route to 192.168.254.200 (the Guest
OS) with 192.168.1.202 as the gateway (the Host
OS).
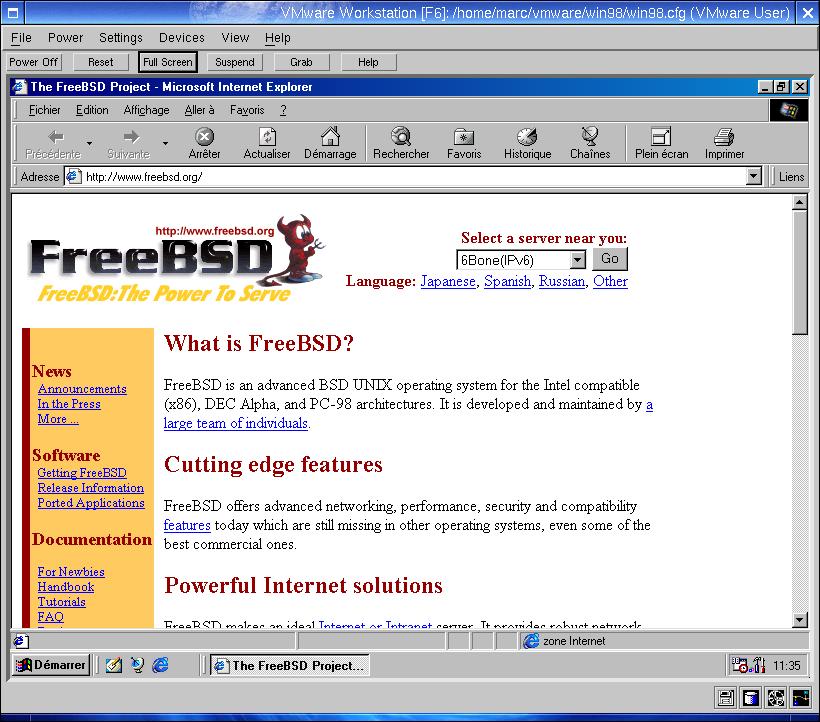
Networking with a virtual machine is really amazing.
As you can see here, I can
access the Internet from the virtual machine (I used
my proxy, a FreeBSD machine running Squid, to provide
access).
I even tried to scan ports on the virtual machine
from another computer on the LAN:
Starting nmap V. 2.53 by [email protected] ( www.insecure.org/nmap/ )
Host vmware (192.168.254.200) appears to be up ... good.
Initiating TCP connect() scan against vmware (192.168.254.200)
Adding TCP port 139 (state open).
The TCP connect scan took 3 seconds to scan 1523 ports.
For OSScan assuming that port 139 is open and port 1 is closed and
neither are firewalled
Interesting ports on vmware (192.168.254.200):
(The 1522 ports scanned but not shown below are in state: closed)
Port       State       Service
139/tcp    open        netbios-ssn

TCP Sequence Prediction: Class=trivial time dependency
                         Difficulty=3 (Trivial joke)

Sequence numbers: C6EA9 C6EBF C6ED1 C6EEA C6F02 C6F1E
Remote operating system guess: Windows NT4 / Win95 / Win98

Nmap run completed -- 1 IP address (1 host up) scanned in 4 seconds

Starting nmap V. 2.53 by [email protected] ( www.insecure.org/nmap/ )
Host vmware (192.168.254.200) appears to be up ... good.
Initiating TCP connect() scan against vmware (192.168.254.200)
Adding TCP port 139 (state open).
The TCP connect scan took 2 seconds to scan 1541 ports.
Initiating FIN,NULL, UDP, or Xmas stealth scan against vmware (192.168.254.200)
The UDP or stealth FIN/NULL/XMAS scan took 7 seconds to scan 1541 ports.
Interesting ports on vmware (192.168.254.200):
(The 3079 ports scanned but not shown below are in state: closed)
Port       State       Service
137/udp    open        netbios-ns
138/udp    open        netbios-dgm
139/tcp    open        netbios-ssn

Nmap run completed -- 1 IP address (1 host up) scanned in 9 seconds
Printing
I noticed that the parallel port didn't seem to be
working, so I couldn't print from the virtual machine.
As a work-around, I installed a PostScript printer,
outputted what I wanted to print to a file, and
printed from the Host OS.
How did I get the files to the Host OS? The easiest
way is to share a directory on the virtual machine and
use sharity-light to access it from
FreeBSD.
To install sharity-light, look no further
than the ports collection:
# cd /usr/ports/net/sharity-light
# make install distclean
On the virtual machine, allow file sharing and share
the C:\ drive. On the FreeBSD system, add
this line in /etc/hosts:
192.168.254.200 vmware
Do the following as root on the FreeBSD system:
# shlight //vmware/c /mnt
Password:
Using port 1024 for NFS.
# cd /mnt
# ls
AUTOEXEC.BAT  CONFIG.SYS    MSDOS.---     Program Files WINDOWS
BOOTLOG.PRV   DETLOG.TXT    MSDOS.SYS     SETUPLOG.TXT
BOOTLOG.TXT   FRUNLOG.TXT   Mes Documents SUHDLOG.DAT
COMMAND.COM   IO.SYS        NETLOG.TXT    SYSTEM.1ST
To unmount /mnt, do:
# unshlight /mnt
Now you can access Windows' file system and do reads
and writes from your FreeBSD system.
About Performance
On my "low-end" laptop, the speed is fast enough for
most applications, but I think that games, an mpeg
player, etc., would be terribly slow.
To reduce CPU usage when the virtual machine is
started, go into the Devices menu and disconnect RTC.
VMware doesn't save this setting, so to avoid doing it
every time I use VMware, I added this at the end of
~/vmware/win98/win98.cfg (the virtual
machine's configuration file):
rtc.startConnected = FALSE
You can find more information on performance tuning
on VMware's
web site.
- Marc Fonvieille
Return to the
February 2001 Issue


